Welcome to LaraPress
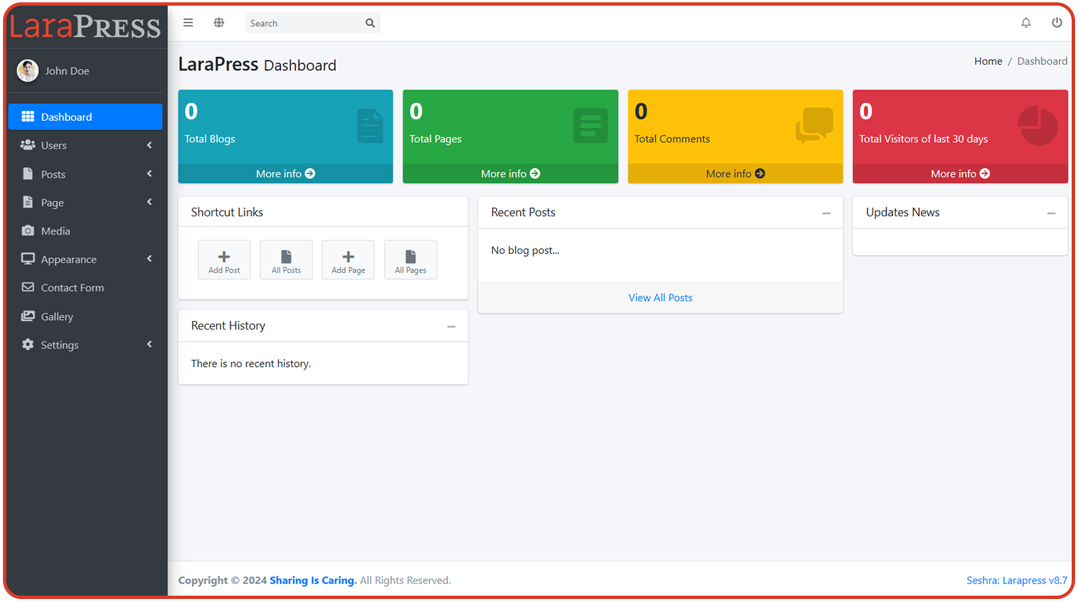
LaraPress is quick and easy way to buid website, on top of Laravel Framework. LaraPress is similar to WordPress, only it is built in popular, secure Laravel Framework. This web platform is designed to simplify your development workflow and bring ease to your projects.
Theme Folder Structure
All themes in LaraPress are located in the themes directory, which resides inside the public directory. 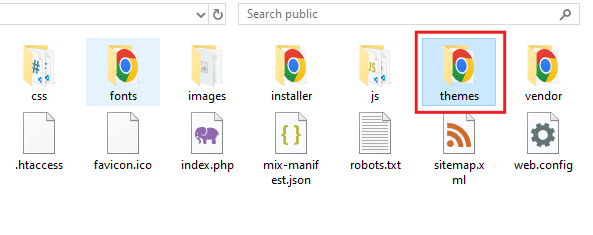 Fig: Themes folder inside public folder
List of themes inside themes folder 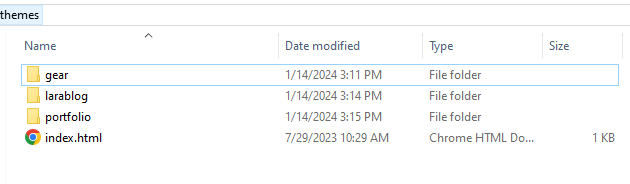 Fig: Themes folder inside the public folder
Each theme must include specific files and directories. For instance, the Gear theme includes the following structure: 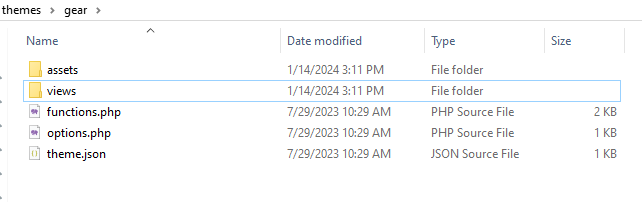 Fig: Files of Gear theme
Required Files and Folders
- assets - Contains theme-specific assets such as CSS, JS, images, etc.
- views - Contains all the view files related to the theme.
- functions.php - Used for registering custom functionalities such as page templates, menus, and post types.
- options.php (optional) - Only required if the theme has custom options.
- theme.json - Contains metadata about the theme including its name, description, author, and version.
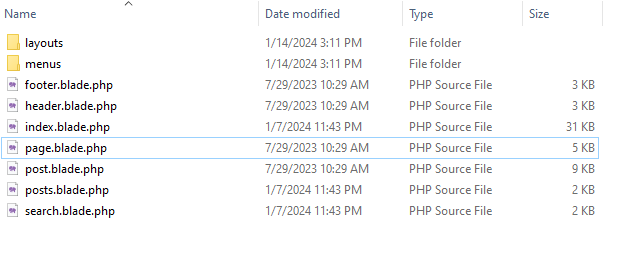 Fig: List of views of Gear theme
Theme File
The theme.json file contains metadata about the theme. Here is an example:
theme.json1{
2    "slug": "gear",
3    "name": "GEAR",
4    "author": "Rabin Shrestha",
5    "description": "This theme is a default theme of LaraPress",
6    "version": "1.0.0"
7}
The functions.php file is used to register custom functionalities such as page templates, navigation menus, and custom post types. Here is an example:
functions.php1<?php
2    # To register custom page template
3    register_page_templates(array(
4        'contact' => __('Contact')
5    ));
6
7    # To register menus
8    register_nav_menus(array(
9        'primary-menu' => __('Primary Menu'),
10        'footer-menu'  => __('Footer Menu')
11    ));
12
13    # To register custom post types
14    register_post_type('services', function () {
15         return array(
16            'label'               => __('Services'),
17            'supports'            => ['title', 'subtitle', 'editor', 'thumbnail', 'category'],
18            'capability_type'     => 'post'
19        );
20    });
The options.php file is optional and is only required if the theme has custom options. Here is an example:
options.php1<?php
2
3	$options = array();
4
5	$options[] = array(
6		'name' => __( 'Slider'),
7		'type' => 'heading'
8	);
9
10	$options[] = array(
11		'name' => __( 'Slide Image'),
12		'id' => 'slide-imgage',
13		'type' => 'upload'
14	);
15
16	$options[] = array(
17		'name' => __( 'Slide Title'),
18		'id' => 'slide-title',
19		'std' => 'Lorem Ipsum Dolar',
20		'type' => 'text'
21	);
22
23
24    register_options($options);
By following this structure, you can ensure that your LaraPress theme is well-organized and adheres to the standard conventions. The theme.json file provides essential metadata, while the functions.php file handles custom functionalities, and the optional options.php file manages custom theme options.
Helper Functions
Theme helpers
-
Site Logo
1 <img src="{{site_logo()}}" alt="logo"> -
Site Favicon
1 <link href="{{site_favicon()}}" rel="shortcut icon">
- Site URL
1 {{url('/')}}
- Site Title
1 {{setting('site-title')}}
- Site Description
1 {{setting('site-description')}}
- Site Email
1 {{setting('site-email')}
- Site Address
1 {setting('site-address')}}
- Site Phone Number
1 {{setting('site-phone')}}
- Site Social Links
1 {{setting('facebook')}}` `{{setting('twitter')}}` `{{setting('linkedin')}}` `{{setting('instagram')}}` `{{setting('youtube')}}
Your can directly use above but if you want to put conditon you can use like this: eg:
1    @if(setting('instagram'))
2        <li>
3            <a href="{{setting('instagram')}}" target="_blank">
4                <i class="fa fa-instagram"></i>
5            </a>
6        </li>
7    @endif
Date Helpers
n PHP, you can use the date() function to format the current date and time. The function takes a format string as a parameter, which specifies how to format the date and time.
1 {{ date('Y-m-d H:i:s') }}
This will output the current date and time in the format: YYYY-MM-DD HH:MM:SS.
Date Format Specifiers
Here are some common format specifiers used with the date() function:
Y = year (e.g: 2024)
m = month (e.g: 01 to 12)
d = day (e.g: 01 to 31)
H = 24-hour format of an hour, with leading zeros (00 to 23)
i = minute (e.g: 00 to 59)
s = seconds (e.g: 00 to 59)
Examples
Full date and time with am/pm notation:
date("F j, Y, g:i a") // March 10, 2001, 5:16 pm
Date with dots as separators:
date("m.d.y") // 03.10.01
Day, month, and year without leading zeros:
date("j, n, Y") // 10, 3, 2001
Compact date format:
date("Ymd") // 20010310
Custom formatted string:
date('\i\t \i\s \t\h\e jS \d\a\y.') // it is the 10th day
Full date with time and timezone:
date("D M j G:i:s T Y") // Sat Mar 10 17:16:18 MST 2001
24-hour format with escaped characters:
date('H:m:s \m \i\s\ \m\o\n\t\h') // 17:03:18 m is month
Current time:
$today = date("H:i:s"); // 17:16:18
Current date and time:
$today = date("Y-m-d H:i:s"); // 2001-03-10 17:16:18
Using the date() function in PHP, you can format dates and times in various ways to suit your needs. The function is highly flexible, allowing for a wide range of formatting options.
Asset URL Helpers
- css
1<link href="{{Theme::asset('css/bootstrap.min.css')}}" rel="stylesheet" />
- Js
1<script src="{{Theme::asset('js/fontawesome.js')}}"></script>
- Images
1<img src="{{Theme::asset('images/banner.png')}}" alt="image" />
Menu
1<ul class="navbar-nav ms-auto">
2   {!! nav_menu('gear::menus.default', 'primary-menu') !!}
3</ul>
Note: ‘gear’ is theme unique name, change it with your theme unique name ‘menus.default’ is menu display code file, ‘primary-menu’ is registered menu name from functions.php
Page
Page Title: {{ $page->title() }} or {{ $page->title }} Page Link: {{ $page->permalink() }} Page Created Date: {{ $page->date('M d, Y', 'created') }} Page featured Image:
1@if($page->hasFeaturedImage()
2    <img src="{{$page->featuredImage()}}">
3@endif
Page Content: {!! $page->content() !!} don’t forget to put !! sign. It should be same as given here {!! $page->content() !!}
Advance Page Content: {!! $page->content($count = 50, $readmore = true, $end ='...') !!}
Note: $count = Number of words you want to display $readmore = If you want to readmore button if $count is less than total words
_$end_ = You can add any string to concatenate at the end of content
Note: If you want to include page submit success and error message you can use this @include('includes.partials.messages')
Post
Post Information
To retrive blogs use posts() function It also support pagination and advance parameters to filter post
posts($pagination = 10, $attributes) method supports $pagination and $attributes
@php $blogs = posts(10) @endphp Info: 10 is pagination number, now $blogs will have 10 blogs in first pagination
Blog Title: {{ $blog->title() }} Blog Link: {{ $blog->permalink() }} Blog Created Date: {{ $blog->date('M d, Y', 'created') }} Blog featured Image:
1    @if($blog->hasFeaturedImage())
2        <img src="{{$blog->featuredImage()}}">
3    @endif
Blog Content: {!! $blog->content() !!} don’t forget to put !! sign. It should be same as given here {!! $blog->content() !!}
Advance BlogContent: {!! $blog->content($count = 50, $readmore = true, $end = '...') !!}
Note: $count = Number of words you want to display $readmore = If you want to readmore button if $count is less than total words
_$end_ = You can add any string to concatenate at the end of content
Blog Categories
1@foreach($blog->categories as $category)
2    <a href="{{$category->permalink()}}">
3        {{$category->title()}}
4    </a>
5@endforeach
Blog Pagination
{{ $blogs->links() }}
Advance Posts
1@php
2     $blogs = posts(2, [
3     			'orderBy' => 'ASC',
4                'category' => 'miscellaneous',
5                'postType' => 'services',
6                'except' => 114,
7                'offset' => 1
8              ]);
9@endphp
Lets learn about what attributes are available in posts() to filter blogs. posts($pagination = 10, $attributes)
1[
2    "orderBy" => "ASC|DESC" | ["id" => "ASC|DESC],
3    "category" => "1|slug",
4    "postType" => "page",
5    "template" => "default",
6    "offset" => "5",
7    "except" => "1|['1']"
8]
-
orderBy Order by can be string value (ASC or DESC) or array value
['id' => 'ASC']. If you use ASC only then it will order by id in ascending order. If you uswe ['created_at' => 'DESC'] it will order by specific column created_at in descending order -
category Category can be the id value of category or unique slug of category or you can also pass array value but it only support array value of id. ['1', '2']
-
postType You can pass post type here. If you pass 'page' then it will only return those post that type is 'page'
-
template Filter by tempalte
-
offset It is used to offset post by given value.
-
except If you want to exclude post then you can use this. If you use only id then it exclude one post, for mulitple post exclude you can you array of ids
To get post list of specific category type like 'Technology'
1@php
2    # cateogory can be id or slug
3    $blogs = posts(5, ['category' => 'technology']);
4@endphp
To get post list of specific post type like 'services'
1@php
2     $blogs = posts(5, ['postType' => 'services']);
3@endphp
** To sort blog post by other than id column**
1@php
2     $blogs = posts(5, ['ordeBy' => ['created_at' => 'DESC']]);
3@endphp
Note: If you want to include page submit success and error message you can use this @include('includes.partials.messages')
Example
eg:
Example of Blog Post1    # Retrive 5 posts and assigned in $blog
2    @php $blogs = posts(5) @endphp
3
4    # Loop through 5 blog post and display title, date and content of each post
5    @foreach($blogs as $blog)
6        <h1>
7            <a href="{{ $blog->permalink() }}">{{ $blog->title() }}</a>
8        </h1>
9        <span>Post Created At: {{ $blog->date('M d, Y', 'created') }}</span>
10        <div>
11            {!! $blog->content() !!}
12        </div>
13
14        # Get categories of blog
15        @foreach($blog->categories as $category)
16            <a href="{{$category->permalink()}}">
17                {{$category->title()}}
18            </a>
19        @endforeach
20    @endoreach
21
22    {{ $blogs->links() }}
Category
Display Posts by Category in Tab Mode
This example demonstrates how to display posts categorized under different services in a tabbed interface using Laravel's Blade template engine. Each tab represents a category, and clicking on a tab displays the posts under that category.
Step-by-Step Guide
- Fetch Categories: Use the
categorieshelper function to fetch all categories related to 'services'.
1 @php $categories = categories('services'`) @endphp
- Create Tabs: Loop through the fetched categories to create the tab headers. The first category is set as active by default.
1    <div class="nav nav-tabs" id="nav-tab" role="tablist">
2        @foreach($categories as $category)
3            <button
4                class="nav-link {{($loop->first) ? 'active' : ''}}"
5                id="nav-{{$category->slug}}"
6                data-toggle="tab"
7                data-target="#{{$category->slug}}"
8                type="button"
9                role="tab"
10                aria-controls="{{$category->slug}}"
11                aria-selected="true"
12            >
13                {{$category->title}}
14            </button>
15        @endforeach
16    </div>
- Create Tab Content: Loop through the categories again to create the content sections for each tab. The content of the first category is shown and active by default.
1    <div class="tab-content">
2        @foreach($categories as $category)
3            <div
4                id="{{$category->slug}}"
5                class="tab-pane fade {{($loop->first) ? 'show active' : ''}}"
6                role="tabpanel"
7                aria-labelledby="nav-{{$category->slug}}"
8            >
9                <div class="col-md-12 mb-4">
10                    @foreach($category->posts as $blog)
11                        // Write code to display blog/post here
12                        // You can find blog disply code in blog section too
13                    @endforeach
14                </div>
15            </div>
16        @endforeach
17    </div>
Full Example Code
1    @php $categories = categories('services'`) @endphp
2    <div class="nav nav-tabs" id="nav-tab" role="tablist">
3        @foreach($categories as $category)
4            <button
5                class="nav-link {{($loop->first) ? 'active' : ''}}"
6                id="nav-{{$category->slug}}"
7                data-toggle="tab"
8                data-target="#{{$category->slug}}"
9                type="button"
10                role="tab"
11                aria-controls="{{$category->slug}}"
12                aria-selected="true"
13            >
14                {{$category->title}}
15            </button>
16        @endforeach
17    </div>
18    <div class="tab-content">
19        @foreach($categories as $category)
20            <div
21                id="{{$category->slug}}"
22                class="tab-pane fade {{($loop->first) ? 'show active' : ''}}"
23                role="tabpanel"
24                aria-labelledby="nav-{{$category->slug}}"
25            >
26                <div class="col-md-12 mb-4">
27                    @foreach($category->posts as $blog)
28                        // Write code to display blog/post here
29                        // You can find blog disply code in blog section too
30                    @endforeach
31                </div>
32            </div>
33        @endforeach
34    </div>
Custom Post Type
Basic Custom Post Type
To register a basic custom post type, use the register_post_type function. Here's an example:
Basic Custom Post Type1    # To register custom post types
2    register_post_type('services', function () {
3         return array(
4            'label'               => __('Services'),
5            'supports'            => ['title', 'subtitle', 'editor', 'thumbnail', 'category'],
6            'capability_type'     => 'post'
7        );
8    });
Advanced Custom Post Type
For more advanced custom post types, you can specify detailed labels and additional supports such as custom inputs. Here's an example:
Advance Custom Post Type1    function custom_post_type_services()
2    {
3        $labels = array(
4            'name'                => __('Services'),
5            'singular_name'       => __('Service'),
6            'menu_name'           => __('Services'),
7            'parent_item_colon'   => __('Parent Services'),
8            'all_items'           => __('All Services'),
9            'view_item'           => __('View Services'),
10            'add_new_item'        => __('Add New'),
11            'add_new'             => __('Add New'),
12            'deleted'             => __('Deleted Services'),
13            'edit_item'           => __('Edit'),
14            'update_item'         => __('Update'),
15        );
16
17        return array(
18            'label'               => __('Services'),
19            'description'         => __('Services'),
20            'labels'              => $labels,
21            'supports'            => [
22                    'title',
23                    'subtitle',
24                    'editor',
25                    'category',
26                    'thumbnail',
27                    'custom_inputs' => [
28                        [
29                            'id' => 'icon',
30                            'type' => 'text',
31                            'title' => 'Icon',
32                            'order' => 2,
33                            'position' => 'left'
34                        ],
35                        [
36                            'id' => 'contributor',
37                            'type' => 'text',
38                            'title' => 'Contributor',
39                            'position' => 'right'
40                        ]
41                    ]
42            ],
43            'show_in_menu'        => true,
44            'menu_position'       => 5,
45            'menu_icon'           => 'fa fa-building',
46            'capability_type'     => 'post',
47        );
48    }
49
50    register_post_type('services', 'custom_post_type_services');
About supports Key
The supports key in the custom post type array can include standard fields such as title, subtitle, editor, thumbnail, category and custom_inputs. You can also add custom inputs. Below is an explanation and example of how to use the supports key with custom inputs:
1[
2    'title' => 'Name',
3    'subtitle' => 'Position',
4    'editor' => 'Biography',
5    'thumbnail' => 'Profile Image',
6    'custom_inputs' => [
7        [
8            'id' => 'phone',
9            'type' => 'text',
10            'title' => 'Phone Number',
11            'order' => 1,
12            'position' => 'left'
13        ],
14        [
15            'id' => 'address',
16            'type' => 'text',
17            'title' => 'Address',
18            'order' => 2,
19            'position' => 'left'
20        ],
21        [
22            'id' => 'date',
23            'type' => 'text',
24            'title' => 'Birth Date',
25            'order' => 1,
26            'position' => 'right'
27        ]
28    ]
29]
Example Explanation
-
Basic Custom Post Type: This example registers a custom post type named 'services' with basic support fields such as
title,subtitle,editor,thumbnail, andcategory. -
Advanced Custom Post Type: This example demonstrates how to create a more detailed custom post type named 'services' with specific labels and additional custom inputs. The
custom_inputsarray allows for custom fields to be defined with properties such asid,type,title,order, andposition. -
Using Custom Inputs:
custom_inputscan be used to add additional fields to the post type.- Each custom input can be assigned an
id,type(e.g., text),title,order, andposition(left or right).
Summary
By following these examples, you can create both basic and advanced custom post types in your application. The supports key allows you to define standard and custom fields, making your custom post types flexible and tailored to your needs.